Unboxing And Setup
description: >- This article describes the basic process of setting up, deploying the default nmap scan attack and retrieving loot from the Shark Jack.
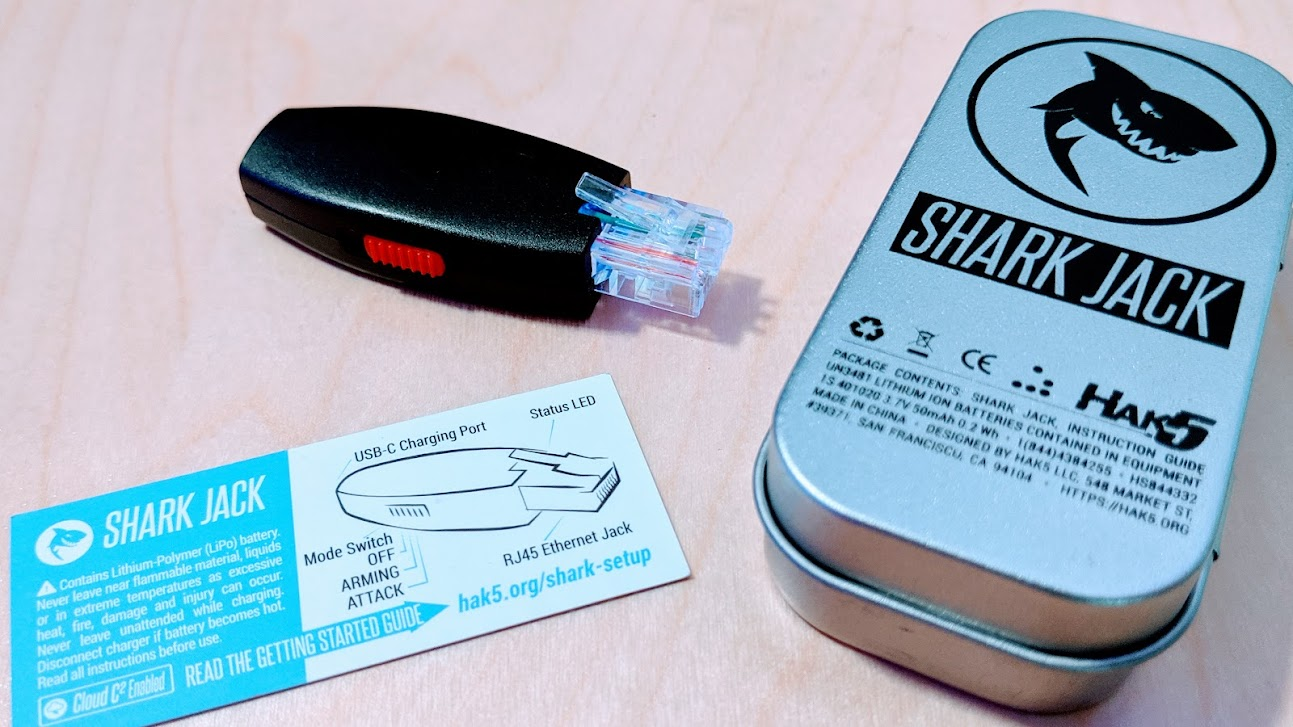
So your Shark Jack just arrived, you’ve had a moment to appreciate the sweet metal case it comes in, and now you’re eager to dig in and get your hack on! Keep reading.
TL;DR - Read the safety info & diagram on the card. Charge it by USB. Flip the switch far forward and plug it into your LAN. When the light goes green, the trap is clean. Unplug, flip the switch to the middle position and plug it into your computer. SSH to root@172.16.24.1 (pass: ‘hak5shark’) and find the scan results in /root/loot.
Cool, then what? Read up at docs.hak5.org, grab the latest firmware & tools from downloads.hak5.org, get chatty at forums.hak5.org, spin up your very own Cloud C2 server from c2.hak5.org, and finally nab & contribute payloads from payloads.hak5.org. Enjoy!
Now obviously the prudent first step would be to RTFM (which you can find at docs.hak5.org) but let’s throw caution to the wind… That is, with the exception of reviewing all of that important safety information – it does include a Lithium battery after all.
Pay heed.\
STEP 1: CHARGE IT UP
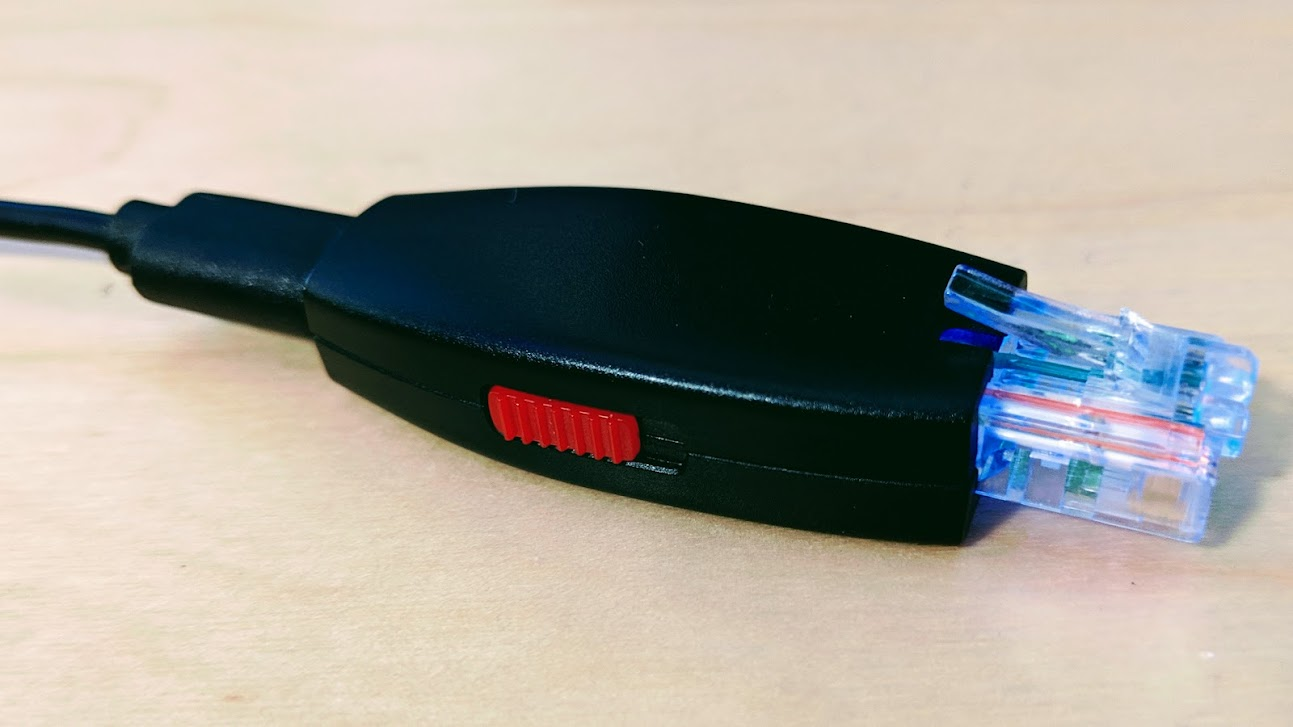
Flip that mischievous red attack switch to the OFF position - that’s the position closest to the USB-C port. Then plug in a USB-C cable to your charger of choice. The Shark Jack will sip a steady 5 volts and about a half amp. After a brief green-blinking boot, it’ll blink blue to show that the battery is charging. Give it a few minutes and it’ll light solid blue. Then, unplug it. And as you recall from that important safety information – you don’t leave lithium batteries unattended while charging. Just sayin’
Shark Jack Cable users may skip this step as it does not include a built-in battery.
STEP 2: JACK INTO A NETWORK
Unplug your Shark Jack from the USB charger and give it a moment to cool down. It’ll be a little warm from charging, but as you know from that important safety information it complies with IEC standards – so you’re all good. Just keep that sly red switch in the off position and take a moment to practice wielding the Shark Jack as if a floppy disk while reciting “you talkin’ to me, punk?” in the mirror. Where were we again? Oh right - jacking into your network…

Find that sweet 24 port switch mounted in your network closet, or RJ45 wall plate if you’ve gone full-geek and wired the house with CAT6. Repeat the phrase “this is my network and I’m totally authorized to pentest it” - then flip the evil red switch far forward, closest to the Ethernet jack, to put it in attack mode. It’ll start booting and blinking - and at any time it’s ready to be plugged into your network. Right outa the box it’ll perform a simple nmap scan - and when the fun is done, the light will go green (and the trap will be clean). It’s then safe to unplug.\
STEP 3: SSH IN TO NAB LOOT
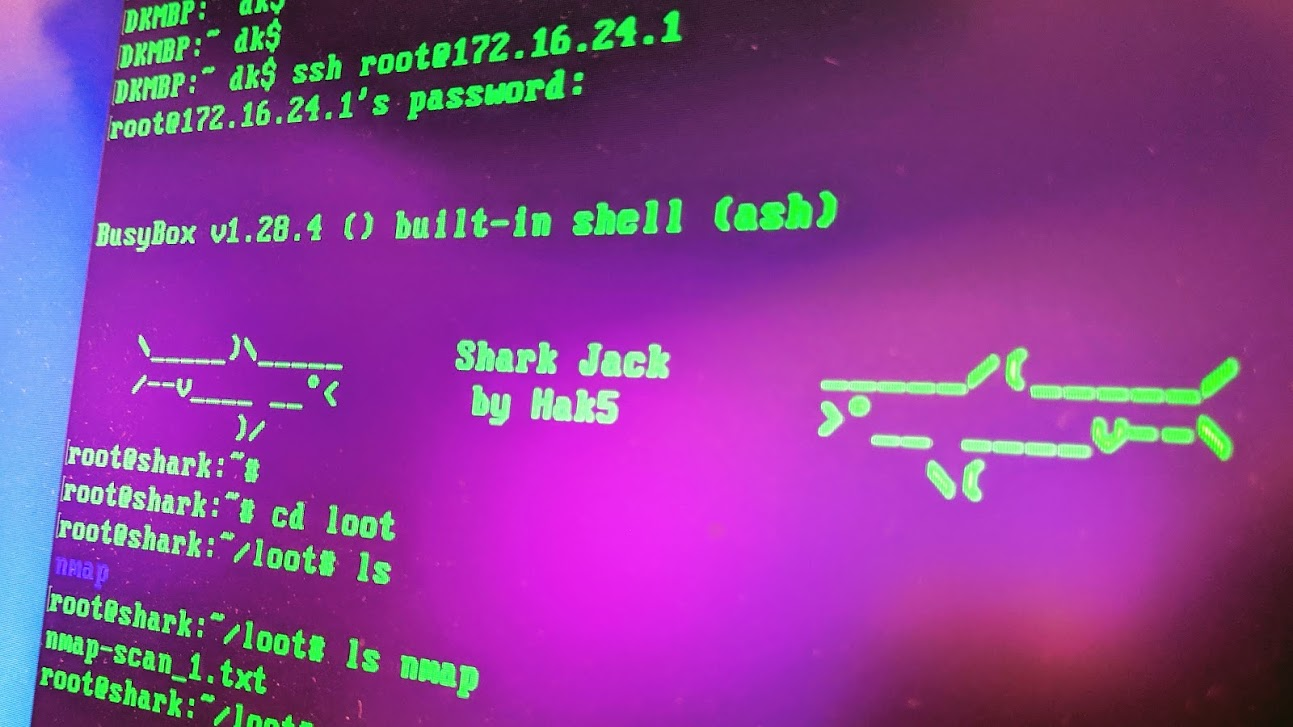
Flip that crafty red switch to the middle position to put your Shark Jack into arming mode. Here instead of being a client on your network, it’ll act as a server. Connect it to your computer’s Ethernet port and you’ll get assigned an IP address in the 172.16.24.x hood. From there just open terminal if on MacOS or Linux, or powershell if you’re on Windows. Then SSH into the Shark Jack with the command “ssh root@172.16.24.1”. The default password is “hak5shark”. After admiring the cute shark ASCII art in the banner, cd over to /root/loot and enjoy those scan results. Want to change the payload? Just copy a payload.sh to /root/payload – and there’s a growing collection at payloads.hak5.org
Shark Jack Cable users may access the shell via Serial rather than SSH as no Ethernet interface is required.
Want to make all that even easier? Download the sharkjack.sh script (for Mac and Linux) from the Shark Jack section of downloads.hak5.org – it’ll automate gathering loot, swapping out payloads and even upgrading the firmware (you’ll wanna do that – new features and tools are added from time to time).\
THAT’S IT FOR THE BASICS
Of course you should also familiarize yourself with the ins and outs detailed in the official Shark Jack documentation at docs.hak5.org.
Once you start diving in and testing payloads, you may also want to set yourself up with a Cloud C2 server – it’s great for remote access and exfiltration and is supported by a lot of the payloads. There’s a free community version to be had at c2.hak5.org, and it runs on your own hardware, so we never see your bits (we don’t wanna see ’em).
And finally, join the community at forums.hak5.org – it’s home to some really bright pentesters and enthusiasts just like yourself, so you’ll fit right in. Cheers!